Developing with the Particle Photon
While I was searching for an easy way to bring the internet-of-things to my home, the Particle Photon caught my eye. I had previously rejected the Arduino WiFi shield as too expensive and the ESP8266 as too obtuse, so I immediately ordered some Photons for development. When they arrived, I had already decided on my first project– controlling my air conditioner over the internet.
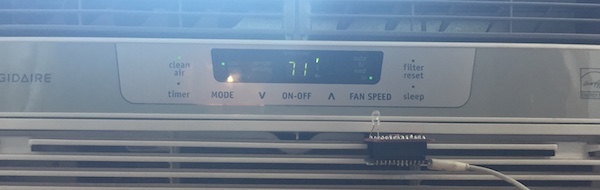
One of the things people from outside of New York might not associate with the city is the ubiquity of in-window air conditioners. In fact, most of us get by without central air. My air conditioner has an infrared remote that lets me control it while enjoying the comfort of my couch but not when I’m away from my apartment. This means that I often experience the joy of coming out of the sweltering 95° heat into my refreshing 92° apartment. When I found the Particle Photon, I saw it as a chance to alleviate myself of the summer’s problems.
Initial Setup
Particle provides plenty of options for registering your Photons with your local WiFi. I used the Particle app for my first photon but decided to go for the deeper developer experience and use the Particle CLI to setup my second one. The app was certainly handy, but only the CLI can provide you with the thrill of raw text and blinking cursors. In fact, the CLI is so useful, I simply stuck with my standard Atom setup rather than using Particle’s convenient web and native Atom-based IDEs. Having access to such a wide variety of high-quality tools really elevated Photon development over the standard Arduino process. And with so many options available, most developers should be able to find a workflow that suits them.
Working with Arduino Libraries
Particle bills the Photon developer experiencing as being “Arduino-like”. To make sure my Photons were working, I brought out the standard Hello World of the Arduino world. With my environment ready, it only took a few moments to use particle flash to upload some LED-blinking code over WiFi. And lo! The LED did blink.
Simple Arduino programs work well enough, but some difficulties arise when working with external libraries. The online IDE provides a searchable repository of libraries, but only libraries made specifically for Photons are available. It seems that many Arduino libraries can easily be converted by swapping header files and then switching folders around to make them compatible with the online repository. It’s not too much of a hassle, but it would be nice if libraries were compatible without having to go through this ritual. The good news is that the community and Particle seem to be working toward this; it’s just not the case yet.
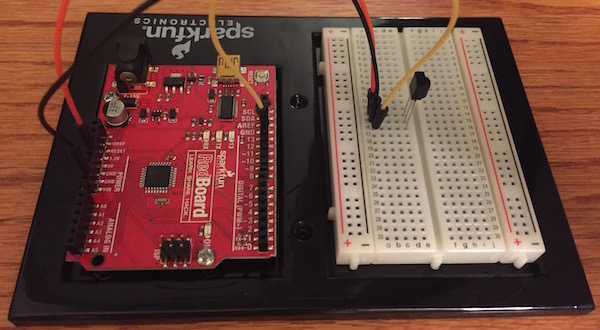
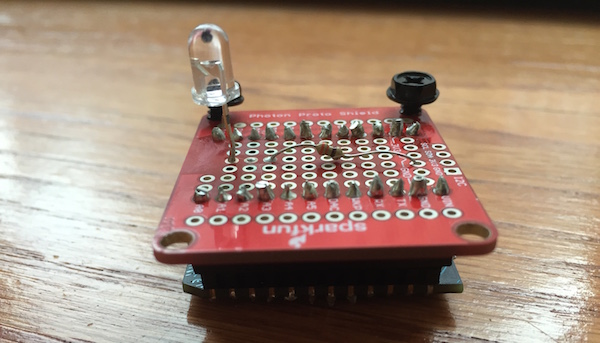
Since I needed to communicate with my air conditioner via IR, I started with the Arduino-IRremote library. Unfortunately, this library isn’t directly translatable via the method above, but I did find a Particle-compatible version: Spark-Core-IRremote. This library provides full capabilities for IR transmission, which is all I needed for my air conditioner controller. To get to the point where I could transmit anything, though, I needed to decode my remote’s IR signals, which only the Arduino-IRremote library provided. Fortunately, I had an extra SparkFun RedBoard lying around, so I threw the Arduino-specific code on that and got the IR information I needed. Once I had gotten all that out of the way, the actual code was extremely simple, allowing me to turn on my air conditioner with just a few lines of code.
Connecting to your code
At this point, I had a Photon that was emitting the power signal for my air conditioner once per second. Great for amazing your friends and confounding your enemies, but not exactly what I had set out to accomplish. My goal was to activate my Photon only when I accessed it over the internet. The ease with which Particle let me accomplish this was particularly exciting– I just registered my existing function with Spark.function, and a RESTful endpoint was automatically exposed for me. I was able to go from a program that continuously activated my air conditioner to one that powered it every time I POSTed to a URL. I added this URL as a favorite in Loaf, and I’m now able to activate my RESTfully-aware air conditioner on the go. Now I can come home to a delightfully cool apartment, rather than one that’s just as hot as it is outside.
A Caveat on Continued Connectivity
In my experience running my program on the Particle Photon, I’ve run into a known problem— my Photon will occasionally lose internet connectivity and become unresponsive. Since it quickly flashes blue when this happens, it has been affectionately dubbed the “Blue Flash of Death” by the community. Thankfully, the Particle development team is very responsive and quick to investigate issues, so I have no doubts that this will be resolved soon. As a workaround for now, I’m having the Photon reset itself on a fixed interval, since it properly reconnects when restarting. It’s worth noting that this is a very new product, and I came prepared to deal with bugs. This bug hasn’t greatly affected me, but I can see how it could be a problem with devices that monitor and constantly publish data to the cloud using the Photon’s pub/sub features.
A Great Option for the Internet-of-Things
The Particle Photon is a great option for connecting your projects to the internet. Its CLI is incredibly useful, allowing you to manage your devices and upload your code from the comfort of your terminal. Adding REST-callable functions to your project is incredibly simple, and you also get easy access to GET-able variables, events, and pub/sub. Even though there are some kinks now, I have faith that the development team will address them. As the internet-of-things movement continues to grow in popularity, plenty more hobby developers will want to add connectivity and communication to their homes. My home, in particular, will be connected via the Particle Photon.